OpenOTP Suite Virtual Appliance
RCDevs Virtual Appliance Startup Guide
The RCDevs VMware Appliance is a standard and minimal Rocky Linux (64Bit) installation with the RCDevs software packages already installed with yum. The Appliance contains the following (already configured) components:
- WebADM Server (installed in /opt/webadm/).
- WebADM Web Services: OpenOTP, SMSHub, OpenSSO, SpanKey, TiQR (installed in /opt/webadm/websrvs/).
- WebADM WebApps: SelfDesk, SelfReg, PwReset, OpenID (installed in /opt/webadm/webapps/).
- OpenOTP Radius Bridge (installed in /opt/radiusd/).
- RCDevs Directory Server (OpenLDAP in /opt/slapd/).
- MySQL Database Server (MariaDB).
- Postfix local Mail Transfer Agent.
To use the RCDevs VMware appliance, proceed as follows:
1. Download and Start the Appliance
Go to RCDevs Website to download the Appliance ZIP archive. The Appliance is provided in both VMX and OVF formats. The appliance is compatible with VMware ESX, ESXi, Workstation and Oracle VirtualBox, Hyper-V. Unzip the archive and in VMware choose Import Appliance. Select the VMX or OVF file.
Important
Do not copy and run the appliance directly without importing because the Appliance will fail during the boot process with a read-only filesystem error.
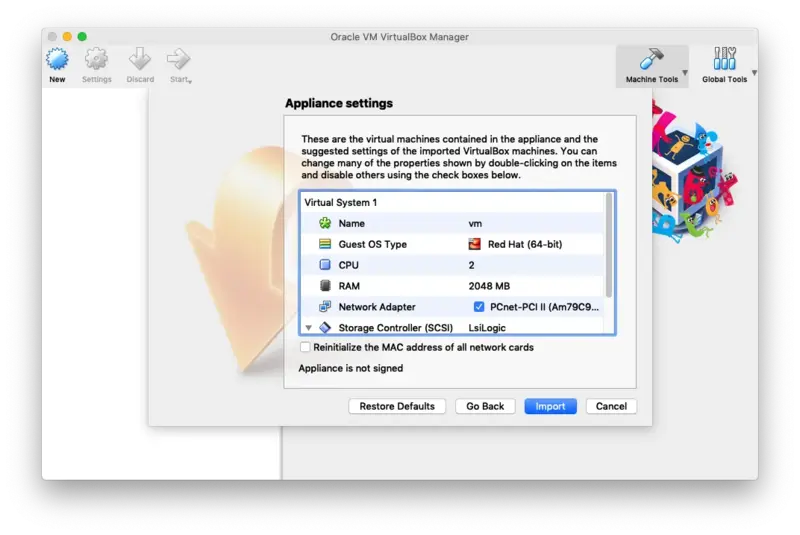
If required, you can adjust the CPU and memory settings of your Appliance. By default, it is configured with virtual 2 CPUs and 1GB memory.
In case you choose to use the VMX import format (and not the preferred OVF format), you will need to set up the VM system by yourself and use the VMX as SCSI storage file. The following configuration information may be useful:
- System type: Linux 64Bit (2 CPUs and 1Go RAM)
- Disk controller: SCSI LsiLogic
- Drive: the VMX file is a dynamically allocated 20 Go drive
- Network: PCnet-FAST III (Am79C973) card
Keep the boot console opened during the boot process to track any startup error. The Appliance is configured to get its IP address via DHCP.
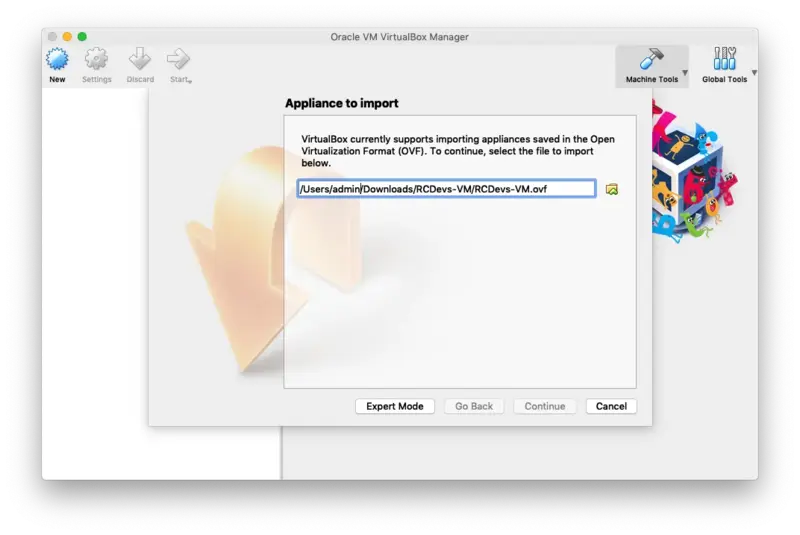
2. VirtualBox Import
In the VirtualBox Menu click on File then Import Appliance. Now select the RCDevs Virtual Appliance File RCDevs-VM.ovf to import and click on Continue.
Now click on Import.
The guest operating system 'rhel7_64Guest' is not supported
If you encountered this kind of message during the RCDevs VM import, then you have to adjust the compatibility mode according to your ESXi, Workstation, Fusion or Player version. Have a look at the VMWare website to have more information about virtual hardware versions supported according to your VMWare version. To change the hardware version on the VM, have a look at the VM settings > Compatibility mode and change the hardware version with one supported by your VMWare software.
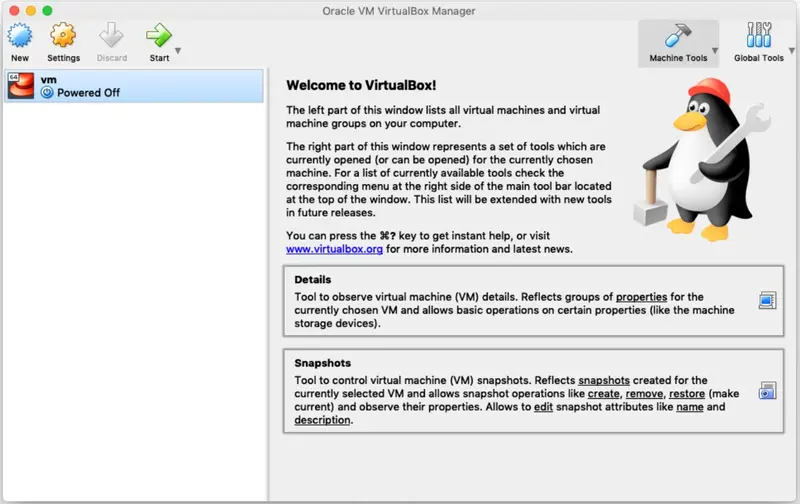
Finally, click on Start to boot the RCDevs Virtual Appliance.
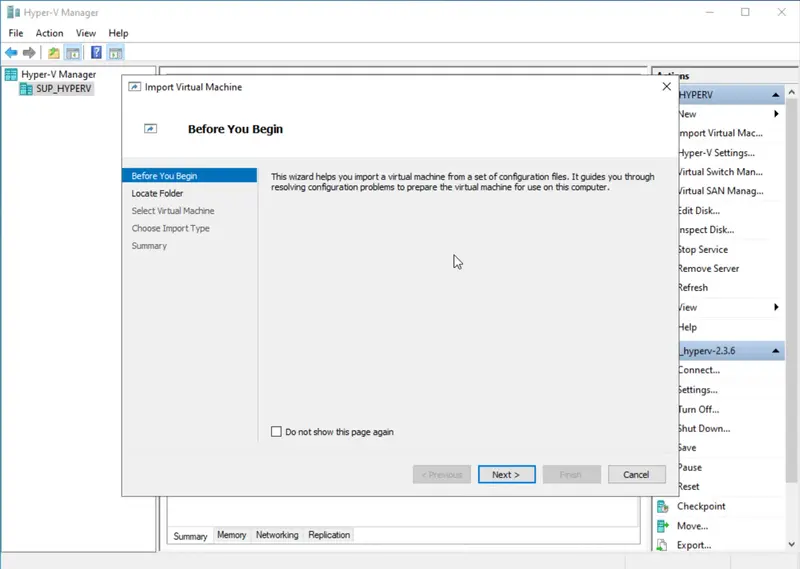
3. Hyper-V Import
- Open Hyper-V Manager on the target host :
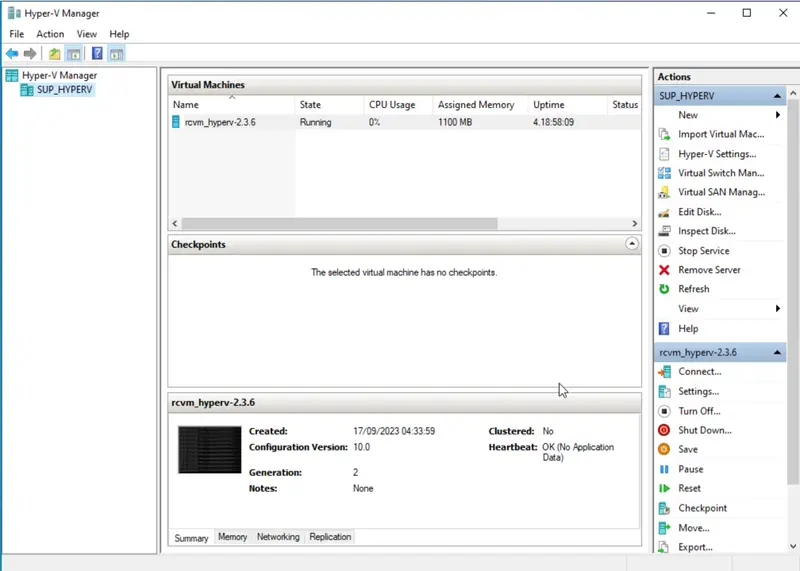
- In the right-hand pane, under “Actions,” click on “Import Virtual Machine.” :
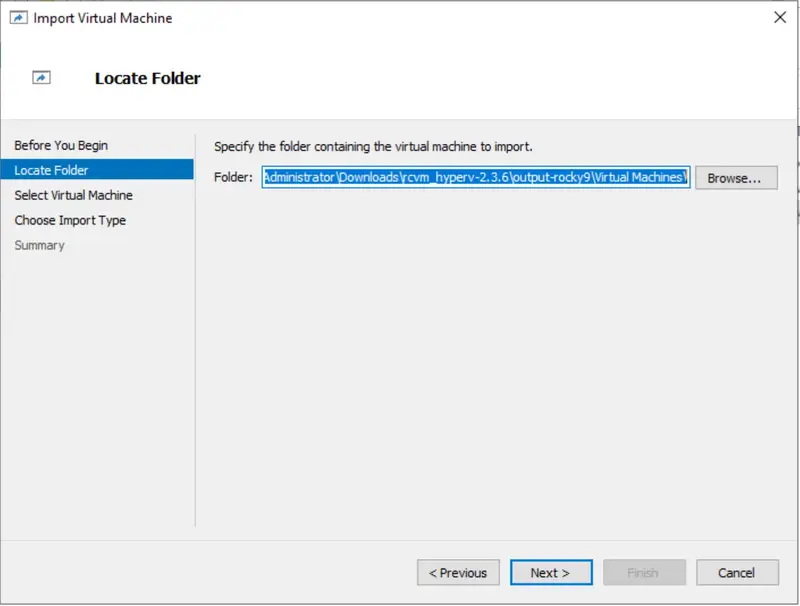
- Browse to the folder where you copied the exported VM, and select the folder containing the VM configuration files. Click “Next.” :
- Click “Next."
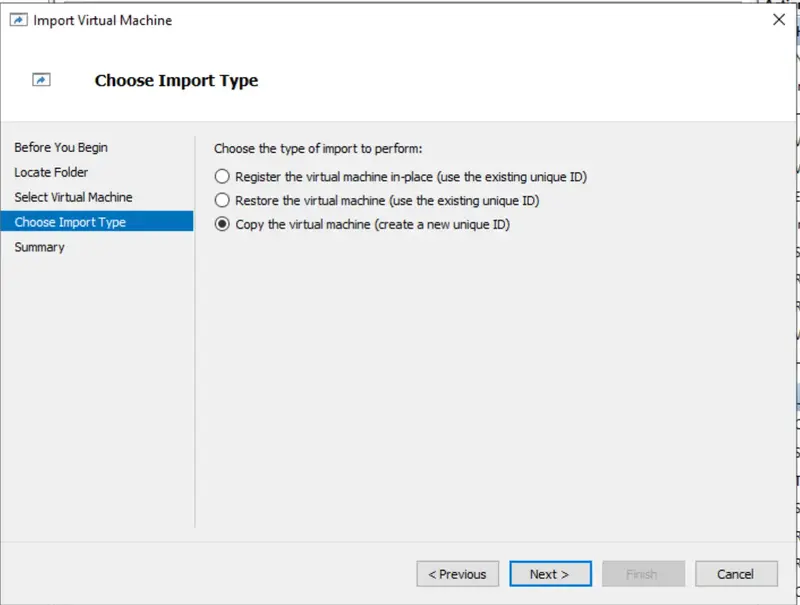
- Choose the import type:
- Copy the virtual machine (create a new unique ID): Select this if you want to create a new instance of the VM with a unique ID.
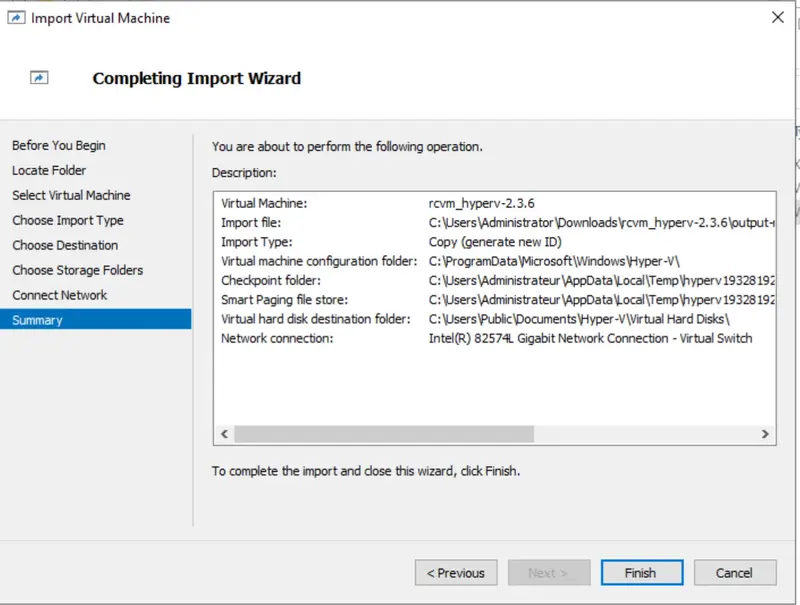
- Review the settings and click “Finish” to start the import process :
> Continue with the VM configuration
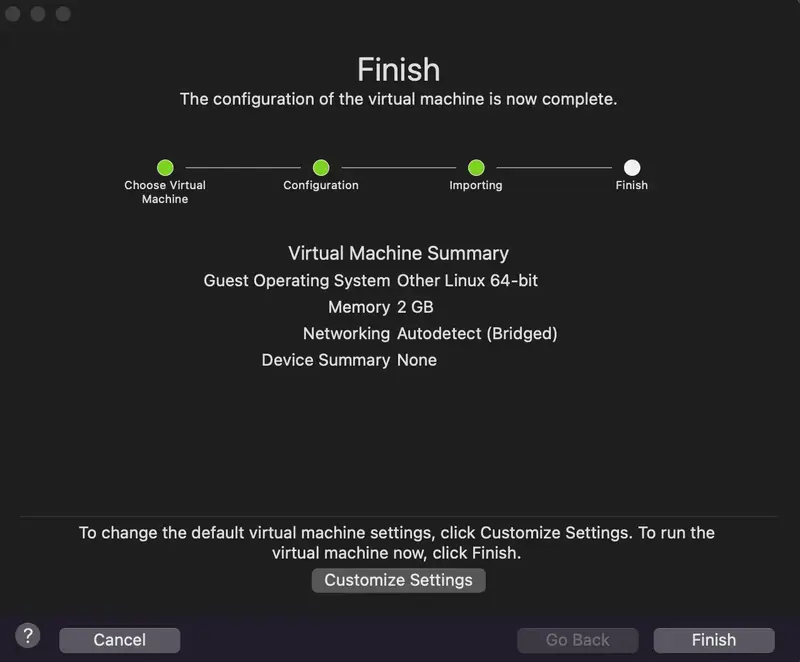
4. VMware Import
-
Locate Your VM Files:
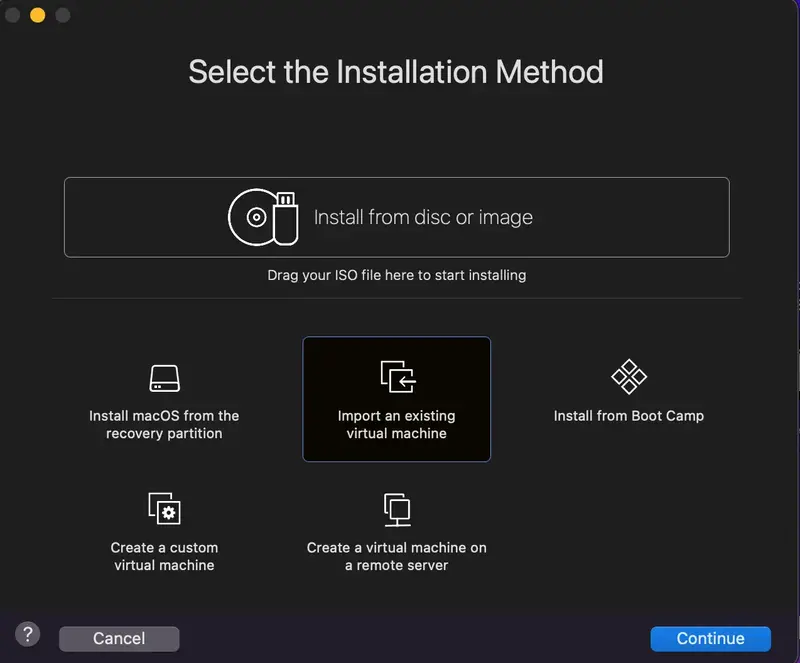
-
Select the VM Source:
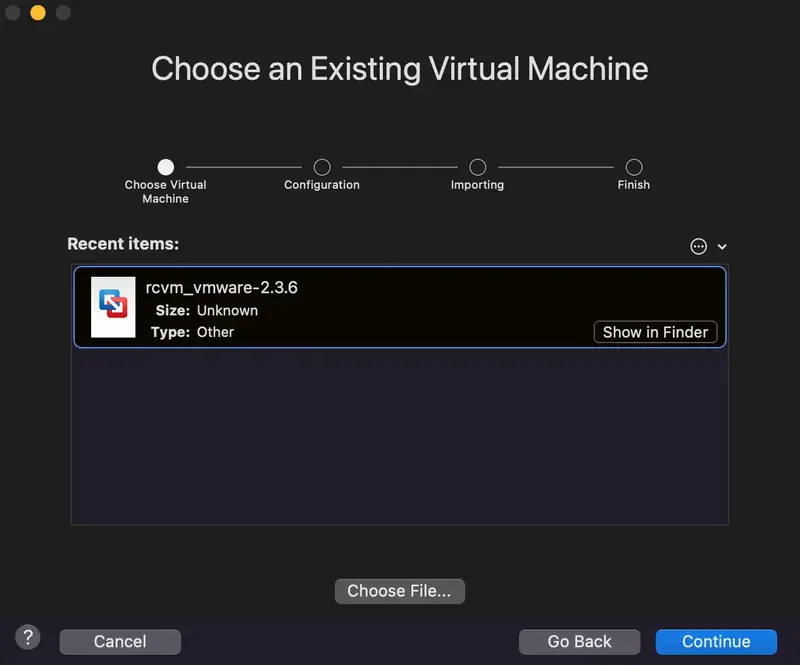
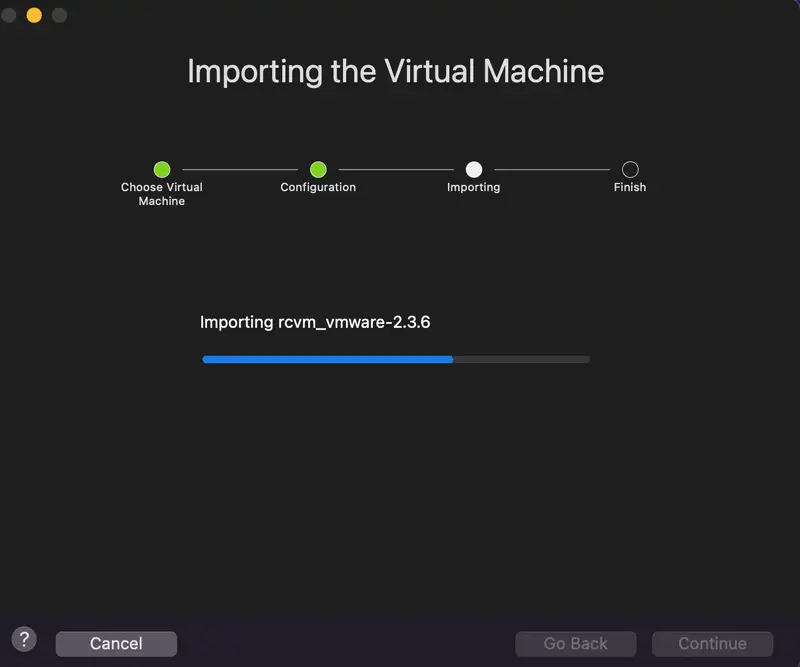
-
Click on Finish :
5. Start the Setup Script
This script occurs only once (at first boot) and does not require a login password.
You can open the console or access with ssh to do the setup at first boot.
You can restart it with vm_init command.
The WebADM setup script asks for:
- Your time zone.
- Optionally to set the network interface.
- Choose and configure an LDAP server (the default LDAP server is already configured).
After this short setup is completed, the script will start all the services:
- WebADM HTTP, SOAP, PKI and Session Manager Services.
- Radius Bridge Service
- LDAP Server
- SQL server
5.1 Setup with the Local LDAP Database
-------------------------------------------------------------------------
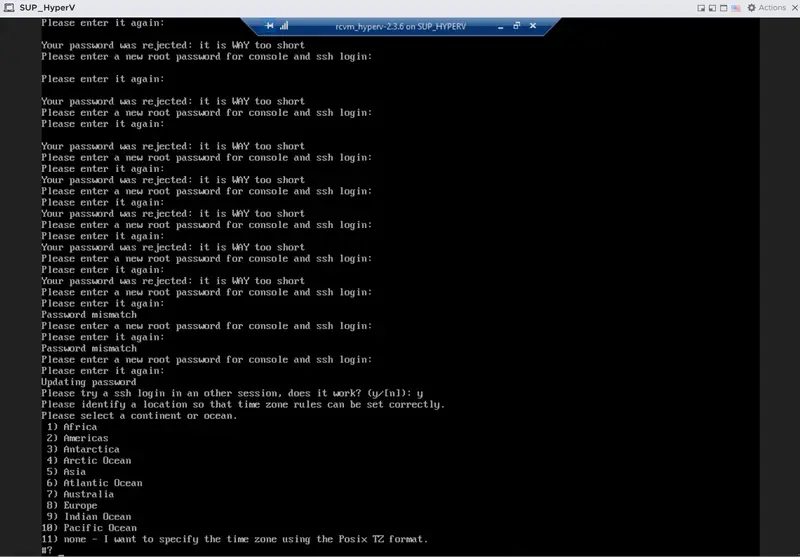
Welcome to RCDevs VMWare Appliance 1.7.0!
-------------------------------------------------------------------------
Please identify a location so that time zone rules can be set correctly.
Please select a continent or ocean.
1) Africa
2) Americas
3) Antarctica
4) Arctic Ocean
5) Asia
6) Atlantic Ocean
7) Australia
8) Europe
9) Indian Ocean
10) Pacific Ocean
11) none - I want to specify the time zone using the Posix TZ format.
#? 8
We choose the time zone, for example, Luxembourg in Europe.
Please select a country.
 1) Albania		               18) Guernsey		        35) Poland
 2) Andorra		               19) Hungary		        36) Portugal
 3) Austria		               20) Ireland		        37) Romania
 4) Belarus		               21) Isle of Man	        38) Russia
 5) Belgium		               22) Italy		        39) San Marino
 6) Bosnia & Herzegovina       23) Jersey	            40) Serbia
 7) Britain (UK)	           24) Latvia		        41) Slovakia
 8) Bulgaria		           25) Liechtenstein	    42) Slovenia
 9) Croatia		               26) Lithuania		    43) Spain
10) Czech Republic	           27) Luxembourg	        44) Sweden
11) Denmark		               28) Macedonia		    45) Switzerland
12) Estonia		               29) Malta		        46) Turkey
13) Finland		               30) Moldova		        47) Ukraine
14) France		               31) Monaco		        48) Vatican City
15) Germany		               32) Montenegro	        49) Åland Islands
16) Gibraltar	               33) Netherlands
17) Greece		               34) Norway
#? 27

The following information has been given:

	Luxembourg

Therefore TZ='Europe/Luxembourg' will be used.
Local time is now:	Thu Jul 13 13:36:07 CEST 2017.
Universal Time is now:	Thu Jul 13 11:36:07 UTC 2017.


This VM is running with dynamic IP assignment (DHCP)
The current IP address is 192.168.3.160
All following options are set with the default value in square brackets. You can keep it by pressing enter.
Do you want to configure a static IP ([y]/n)? y
Please type the fixed IP address [192.168.3.160]: 192.168.3.160
Please type the network mask [255.255.255.0]: 255.255.255.0
Please type the gateway address [192.168.3.254]: 192.168.3.254
Please type your primary DNS server IP [8.8.8.8]: 8.8.8.8
Please type your secondary DNS server IP []:
Fixed IP address: 192.168.3.160
Network address: 192.168.3.0
Network mask: 255.255.255.0
Gateway IP address: 192.168.3.254
Primary DNS server: 8.8.8.8
Do you confirm ([y]/n): y
Writing /etc/sysconfig/network-scripts/ifcfg-ens33
Restarting network...
Please enter the hostname [rcvm8.rcdevs.local]:rcvm8.rcdevs.local
Checking system architecture...Ok
RCDEVS WEBADM LICENSE AGREEMENT
RCDevs WebADM Server ("WebADM")
Copyright (c) 2010-2023 RCDevs Security SA, All rights reserved.
IMPORTANT: READ CAREFULLY: By using, copying or distributing the Software
Product you accept all the following terms and conditions of the present
WebADM License Agreement ("Agreement").
If you do not agree, do not install and use the Software Product.
WebADM includes additional software products provided by RCDevs SA under
freeware and commercial licenses. These additional software are installed
under the "/opt/webadm/webapps" and "/opt/webadm/websrvs" directories.
This Agreement is subject to all the terms and conditions of any such
additional software license.
1. DEFINITIONS. "Software Product" means RCDevs Server with which the
Agreement is provided which may include third party computer information
or software, including apache2, php, libmcrypt, libcurl, libgmp, redis,
libxml2, libpng, libqrencode, openldap, openssl, apcu, unixodbc, geoip,
expat, hiredis, nghttp2, hiredis, libmaxmind, openscn libcouchbase
unmodified software and libraries and related explanatory written
materials ("Documentation"). "You" means you or any recipient that
obtained a copy of the Software Product pursuant to the terms and
conditions of the Agreement.
2. LICENSE. Subject to your compliance with the terms and conditions of
the Agreement, including, in particular, the provisions in Sections 3, 5
and 6 below, RCDevs hereby grants You a non-exclusive and royalty-free
license to use and distribute the Software Product solely for
non-commercial purposes in worldwide. You may:
a. download and install the Software Product on any computer in your
possession;
--More--(22%)
In the next step you are invited to accept the Agreement to continue :
I agree with RCDevs WebADM terms and conditions (Yes/No): Yes
Setup WebADM as master server or slave (secondary server in a cluster)([m]/s)? m
WebADM proposes 4 default configuration templates:
1) Default configuration (RCDevs Directory)
2) Other generic LDAP server (Novell eDirectory, Oracle, OpenLDAP)
3) Active Directory with schema extention (preferred with AD)
4) Active Directory without schema extention
Choose a template number [1]: 1
Checking LDAP port 389 on localhost... Ok
Enter the server fully qualified host name (FQDN) [rcvm8.rcdevs.local]:rcvm8.rcdevs.local
Generating CA private key... Ok
Creating CA certificate... Ok
Generating SSL private key... Ok
Creating SSL certificate request... Ok
Signing SSL certificate with CA... Ok
Adding CA certificate to the local trust list... Ok
Setting file permissions... Ok
Adding systemd service... Ok
Adding logrotate scripts... Ok
Generating secret key string... Ok
WebADM has successfully been setup.
Created symlink /etc/systemd/system/multi-user.target.wants/slapd.service → /usr/lib/systemd/system/slapd.service.
Created symlink /etc/systemd/system/multi-user.target.wants/radiusd.service → /usr/lib/systemd/system/radiusd.service.
Created symlink /etc/systemd/system/multi-user.target.wants/ldproxy.service → /usr/lib/systemd/system/ldproxy.service.
WebADM license file is missing. Please install an Enterprise or Freeware license file.
If you just upgraded, WebADM v2.0 now requires a license file even in Freeware mode.
Please point your Web browser to the URL below to get your license file.
After generation, WebADM will auto-install your new license and start.
https://cloud.rcdevs.com/freeware-license/?id=680ec8408c83e2eafthf
Waiting for license file to be generated...
Starting WebADM setup script /opt/webadm/bin/setup
Enter your organization name: Rcdevs
Generating CA private key... Ok
Creating CA certificate... Ok
Generating SSL private key... Ok
Creating SSL certificate request... Ok
Signing SSL certificate with CA... Ok
Adding CA certificate to the local trust list... Ok
Setting file permissions... Ok
Adding systemd service... Ok
Adding logrotate scripts... Ok
Generating secret key string... Ok
WebADM has successfully been setup.
You can connect your server via SSH with 'ssh root@192.168.3.160'.
SSH root password is 'password'.
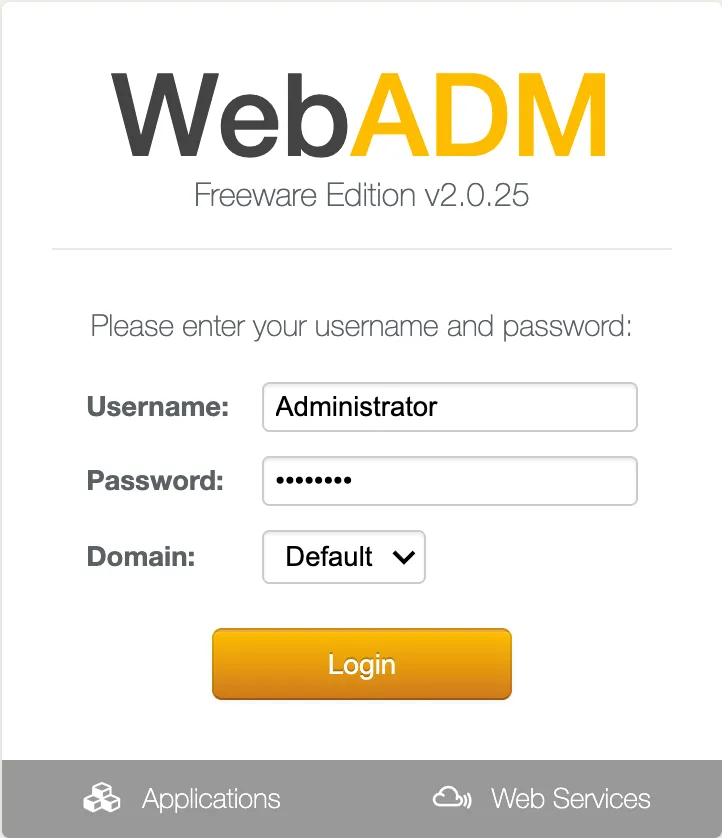
You can login RCDevs WebADM Admin Portal at 'https://192.168.3.160'.
WebADM login username is 'admin'.
WebADM login password is 'password'.
WARNING: This appliance is configured with permissive firewall,
dummy certificates, default passwords for services and root access.
You MUST re-configure your appliance before any production use!
Press any key to finish!
We are now ready to use WebADM.
Have a look at the following documentation to register a token and perform an authentication.
5.2 Setup with an Active Directory Server
-------------------------------------------------------------------------
Welcome to RCDevs VMWare Appliance 1.6.8!
-------------------------------------------------------------------------

Please identify a location so that time zone rules can be set correctly.
Please select a continent or ocean.
 1) Africa
 2) Americas
 3) Antarctica
 4) Arctic Ocean
 5) Asia
 6) Atlantic Ocean
 7) Australia
 8) Europe
 9) Indian Ocean
10) Pacific Ocean
11) none - I want to specify the time zone using the Posix TZ format.
#? 8
We choose the time zone, for example, Luxembourg in Europe.
Please select a country.
 1) Albania		           18)Guernsey		                    35)Poland
 2) Andorra		           19)Hungary		                    36)Portugal
 3) Austria		           20)Ireland		                    37)Romania
 4) Belarus		           21)Isle of Man	                    38)Russia
 5) Belgium		           22)Italy		                        39)San Marino
 6) Bosnia&Herzegovina     23)Jersey		                    40)Serbia
 7) Britain (UK)	       24)Latvia		                    41)Slovakia
 8) Bulgaria		       25)Liechtenstein	                    42)Slovenia
 9) Croatia		           27)Luxembourg	                    44)Sweden
11) Denmark		           28)Macedonia		                    45)Switzerland
12) Estonia		           29)Malta		                        46)Turkey
13) Finland		           30)Moldova		                    47)Ukraine
14) France		           31)Monaco		                    48)Vatican City
15) Germany		           32)Montenegro	                    49)Åland Islands
16) Gibraltar		       33)Netherlands
17) Greece		           34)Norway
#? 27

The following information has been given:
Luxembourg

Therefore TZ='Europe/Luxembourg' will be used.
Local time is now:	    Thu Jul 13 14:04:58 CEST 2017.
Universal Time is now:	Thu Jul 13 12:04:58 UTC 2017.


This VM is running with dynamic IP assignment (DHCP)
The current IP address is 192.168.3.160
All following options are set with the default value in square brackets. We can keep it by pressing enter.
Do you want to configure a static IP ([y]/n)? y
Please type the fixed IP address [192.168.3.160]: 192.168.3.160
Please type the network mask [255.255.255.0]:     255.255.255.0
Please type the gateway address [192.168.3.254]:  192.168.3.254
Please type your primary DNS server IP [8.8.8.8]: 8.8.8.8
Please type your secondary DNS server IP []:

Fixed IP address:   192.168.3.160
Network address:    192.168.3.0
Network mask:       255.255.255.0
Gateway IP address: 192.168.3.254
Primary DNS server: 8.8.8.8
Do you confirm ([y]/n): y
Writing /etc/sysconfig/network-scripts/ifcfg-ens33
Restarting network...
Please enter the hostname [rcvm8.rcdevs.local]:rcvm8.rcdevs.local
Setup WebADM as master server or slave (secondary server in a cluster) ([m]/s)? m
WebADM proposes 4 default configuration templates:
  1) Default configuration (RCDevs Directory)
  2) Other generic LDAP server (Novell eDirectory, Oracle, OpenLDAP)
  3) Active Directory with schema extention (preferred with AD)
  4) Active Directory without schema extention
Choose a template number [1]:  4
We need to choose 3 or 4 instead of 1 for Active Directory and configure it. Option 3 will require an Active Directory schema extension.
Please type the name/ip of the LDAP server [localhost]:192.168.3.139
Please type the port fort LDAP [389]:389
Checking port...Ok
Please choose the encryption ([TLS]/SSL/NONE)?TLS
Please type domain FQDN (i.e. dc=lab,dc=local) []:dc=lab,dc=local
We enter an administrator user for this short configuration. We can change it later in /opt/webadm/conf/webadm.conf if we need. More information for fine-grained permissions are available in chapter 22 LDAP Permissions of Administrator Guide.
Please type a user with read/write acces to LDAP [cn=Administrator,cn=Users,dc=lab,dc=local]:
cn=Administrator,cn=Users,dc=lab,dc=local
Please type the user password:
Testing user access...Ok
Please type the WebADM container [cn=WebADM,dc=lab,dc=local]:
cn=WebADM,dc=lab,dc=local
Starting WebADM setup script /opt/webadm/bin/setup
Backuping previous configuration to /opt/webadm/conf/backup/
Checking system architecture...Ok
Generating CA private key... Ok
Creating CA certificate... Ok
Generating SSL private key... Ok
Creating SSL certificate request... Ok
Signing SSL certificate with CA... Ok
Adding CA certificate to the local trust list... Ok
Setting file permissions... Ok
Adding systemd service... Ok
Adding logrotate scripts... Ok
Generating secret key string... Ok
WebADM has successfully been setup.
Starting services...
Ok
You can connect your server via SSH with 'ssh root@192.168.3.160'.
SSH root password is 'password'.
You can login RCDevs WebADM Admin Portal at 'https://192.168.3.160'.
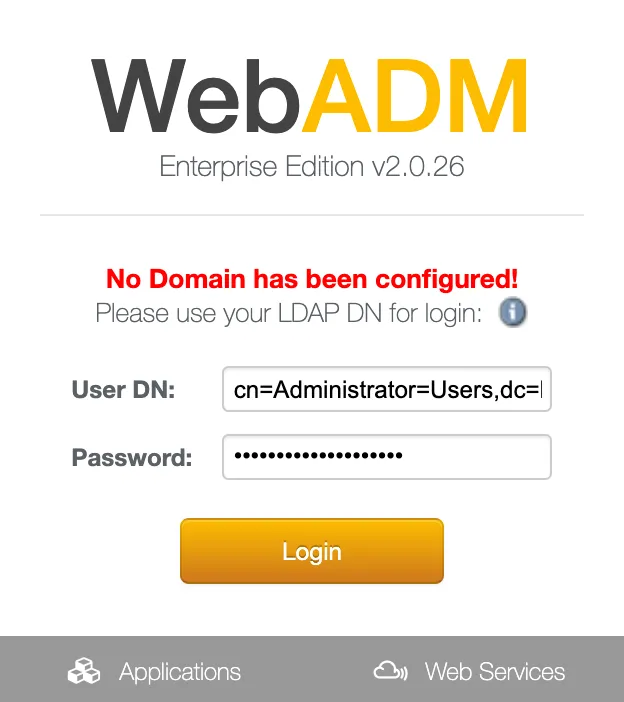
WebADM login user DN is 'cn=Administrator,cn=Users,dc=lab,dc=local'.
WARNING: This appliance is configured with permissive firewall,
dummy certificates, default passwords for services and root access.
You MUST re-configure your appliance before any production use!
Press any key to finish!
Now we connect to the web interface on https://192.168.3.160 and cn=Administrator,cn=Users,dc=lab,dc=local user as indicated above. We will be able to use administrator after the first configuration.
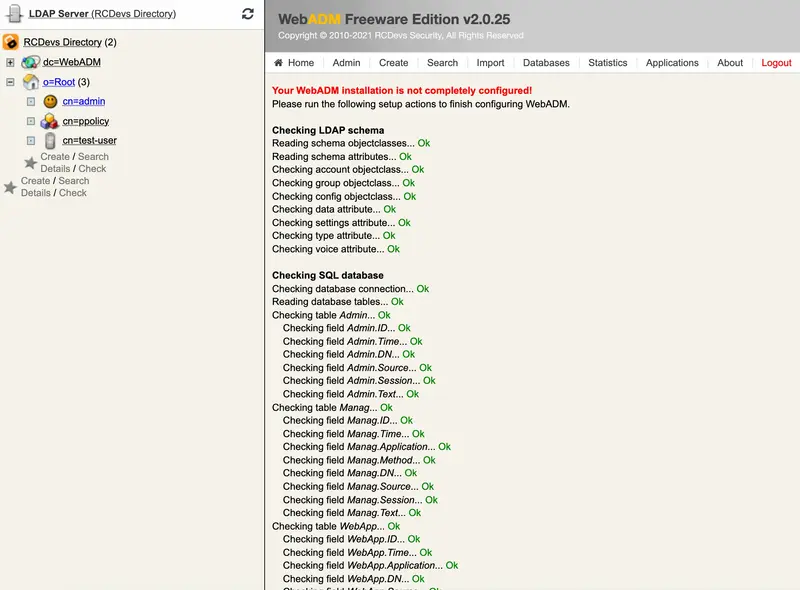
If you use RCDevs Directory Server, the admin DN is cn=admin,o=root. The default password is password.
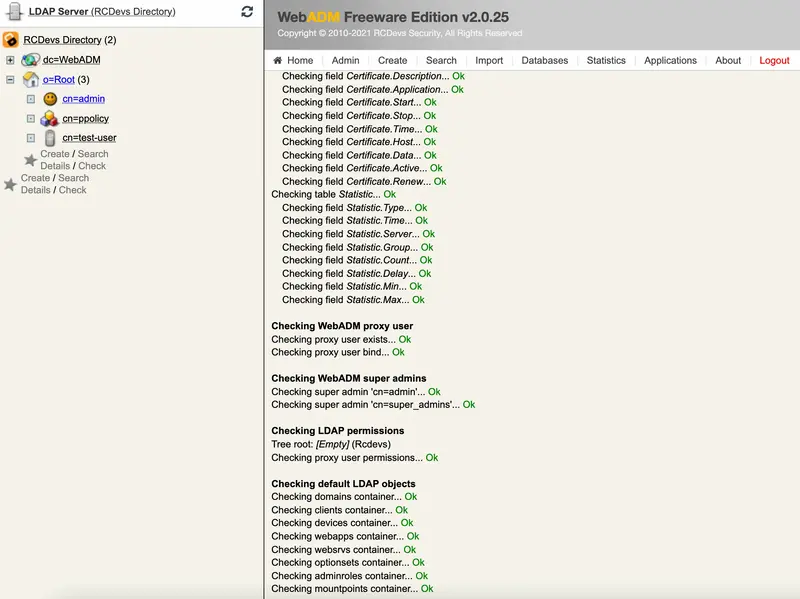
We need to click on Create default containers and objects for creating ldap configurations under cn=webadm,dc=lab,dc=local.
Please, log out and login with the Administrator user as indicated above.
If you use RCDevs Directory Server, the username is admin. The default password is password.
5.2.1 Test User Authentication
Now, it’s time to test your OpenOTP installation by enrolling a Software Token and test a user authentication. Please, follow this documentation OpenOTP Quick Start. If you don’t have a Hardware Token to register then you need to install the OpenOTP Token Mobile Application (Software Token) for the smartphone. Please, read this documentation OpenOTP Token Mobile Application.
6. Resetting the Appliance
At any moment, you can reset the VMware appliance to its original state by running the vm_init command from the shell (for example if we want to restart the initial setup). Be aware that re-running the vm_init script will remove any work data in the VM.
You can find the WebADM setup script in /opt/webadm/bin/ and the Radius Bridge setup script in /opt/radiusd/bin/. With the RCDevs Directory Server version, you can find the OpenLDAP setup script in /opt/slapd/bin/.
Please look at the INSTALL and README files in /opt/webadm/, /opt/radiusd/ and /opt/slapd/.
Thanks for trying RCDevs Security solutions.
7. Upgrade the Appliance
To upgrade the RCDevs appliance, you just need to perform the following command:
yum update
Every RCDevs packages and others installed on the RCDevs appliance will be updated. A restart may be required.
8. Testing your OpenOTP Installation
8.1 Enroll a Software Token
Your OpenOTP Server is now working, and you can start enrolling a test user. We will enroll a Software Token for a new user with OpenOTP Token.
-
On your iPhone or Android phone, go to the App Store and search for OpenOTP Token. Download and install the application on your mobile.
-
Create a WebADM Account test user in your LDAP tree. Go to the top menu in WebADM, and click the
Createbutton. Choose theWebADM Accountobject and create a user with login name ‘testing’ and password ‘test’. Alternatively, you can use an existing WebADM user for your tests. Set the Container (LDAP folder) to a location below you Domain User Search Base.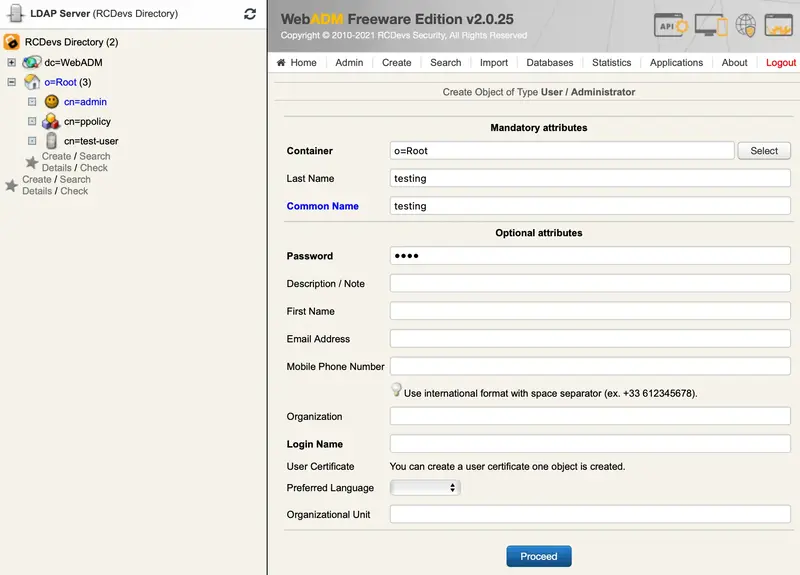
-
Once the user is created, edit it and click the
MFA Authentication Serverbutton in the Application Actions box.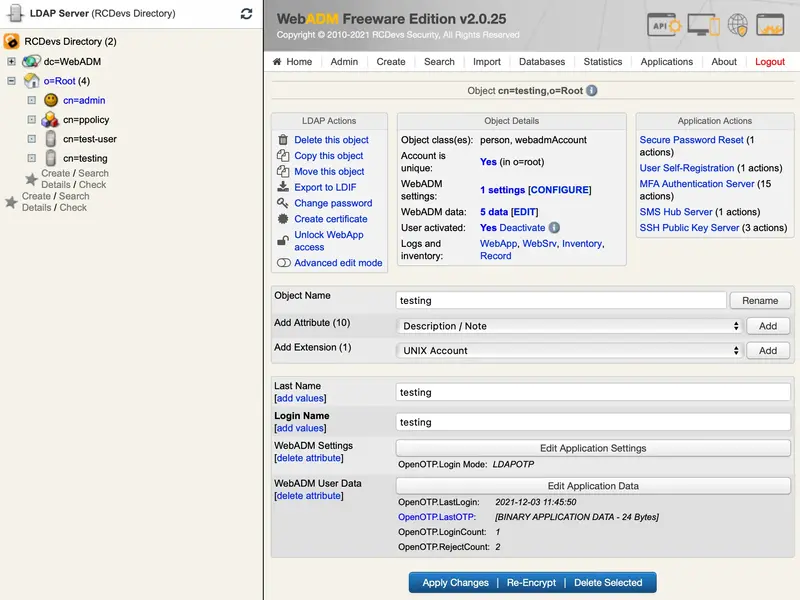
-
Click the
Register / Unregister Tokenbutton.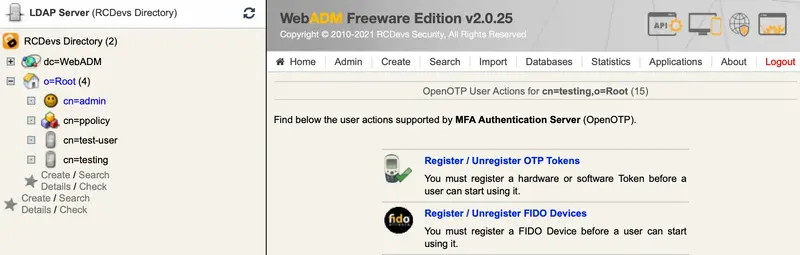
-
Check the OpenOTP Token Time-based or Event-based checkbox. Immediately, a QRCode is displayed on the page.
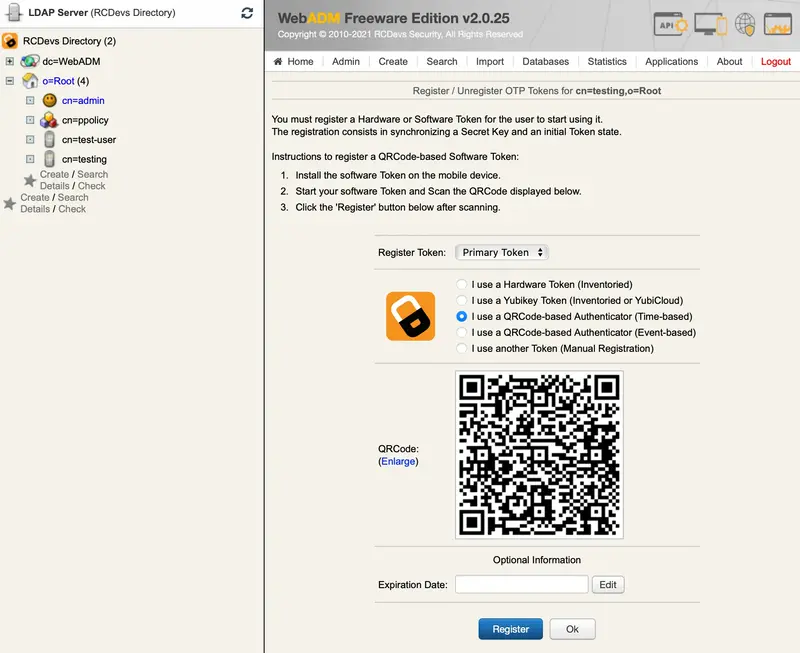
-
Start the OpenOTP Token application on your mobile phone and click the
Camerabutton. Scan the QRCode to register a new Software Token on your mobile phone. When done, click theRegisterbutton on the screen. The Software Token is now registered in OpenOTP.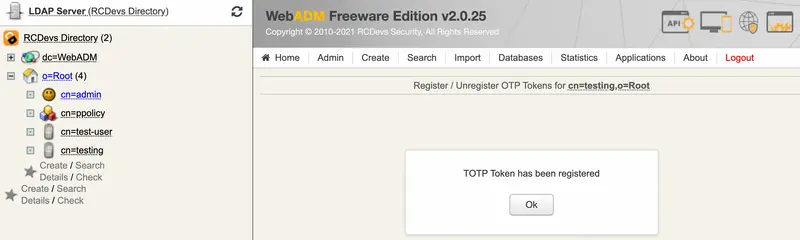
8.2 Test User Authentication
-
Return to the
MFA Authentication Serverin the Application Actions box for the user and click theTest User Authenticationaction.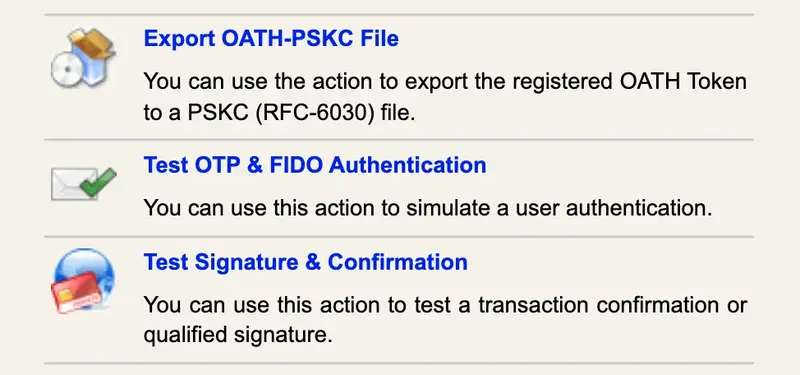
A login form is displayed. Enter ‘test’ in the LDAP Password field and let the rest empty. Click the
Startbutton.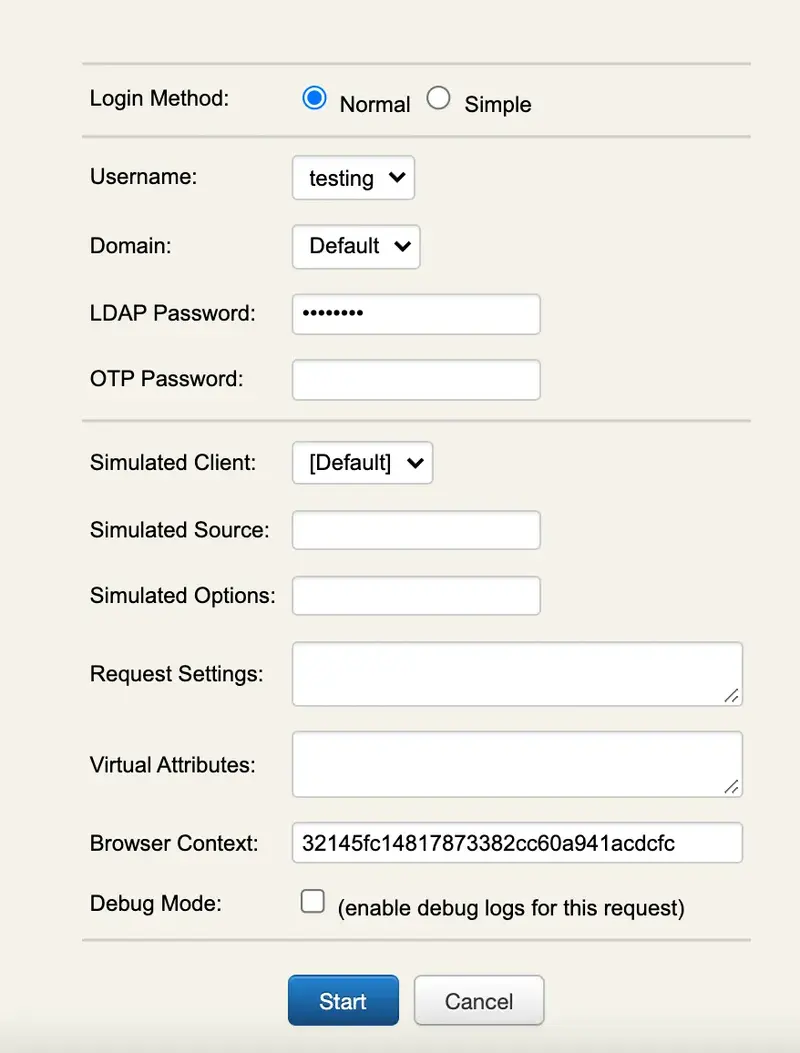
-
You didn’t enter the
OTPin the login andOpenOTPalso activates theChallenged-OTPmode. A new window is displayed with a message asking for your Token password. Enter the password displayed on your OpenOTP Token mobile application.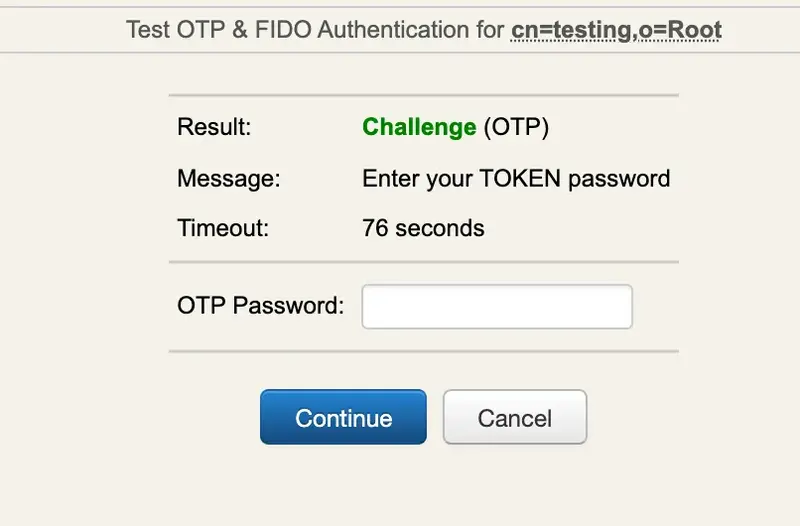
-
WebADM displays the
authentication resultandserver message.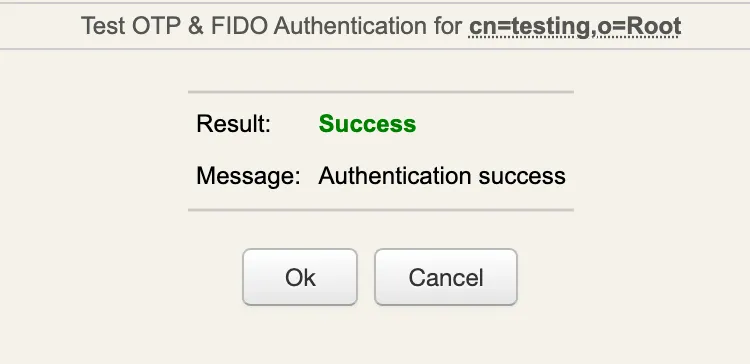
You can have a look at the WebADM Server Log Files in the Database menu to see what happened.
[2021-12-03 11:45:31] [172.16.3.223:43954] [OpenOTP:L4T7VH0U] New openotpNormalLogin SOAP request
[2021-12-03 11:45:31] [172.16.3.223:43954] [OpenOTP:L4T7VH0U] > Username: testing
[2021-12-03 11:45:31] [172.16.3.223:43954] [OpenOTP:L4T7VH0U] > Domain: Default
[2021-12-03 11:45:31] [172.16.3.223:43954] [OpenOTP:L4T7VH0U] > LDAP Password: xxxxxxxxxxx
[2021-12-03 11:45:31] [172.16.3.223:43954] [OpenOTP:L4T7VH0U] > Client ID: OpenOTP
[2021-12-03 11:45:31] [172.16.3.223:43954] [OpenOTP:L4T7VH0U] > Source IP: 172.16.3.223
[2021-12-03 11:45:31] [172.16.3.223:43954] [OpenOTP:L4T7VH0U] > Context ID: 1815a179265fc3b1c38a9f78dea6d3d1
[2021-12-03 11:45:31] [172.16.3.223:43954] [OpenOTP:L4T7VH0U] Registered openotpNormalLogin request
[2021-12-03 11:45:31] [172.16.3.223:43954] [OpenOTP:L4T7VH0U] Resolved LDAP user: cn=testing,o=Root (cached)
[2021-12-03 11:45:31] [172.16.3.223:43954] [OpenOTP:L4T7VH0U] Started transaction lock for user
[2021-12-03 11:45:31] [172.16.3.223:43954] [OpenOTP:L4T7VH0U] Found user fullname: testing
[2021-12-03 11:45:31] [172.16.3.223:43954] [OpenOTP:L4T7VH0U] Found 48 user settings: LoginMode=LDAPOTP,OTPType=TOKEN,ChallengeMode=Yes,ChallengeTimeout=90,OTPLength=6,OfflineExpire=30,MobileTimeout=30,EnableLogin=Yes,HOTPLookAheadWindow=25,TOTPTimeStep=30,TOTPTimeOffsetWindow=120,OCRASuite=OCRA-1:HOTP-SHA1-6:QN06-T1M,DeviceType=FIDO2,U2FPINMode=Discouraged,SMSType=Normal,SMSMode=Ondemand,MailMode=Ondemand,PrefetchExpire=10,LastOTPTime=300,ListChallengeMode=ShowID
[2021-12-03 11:45:31] [172.16.3.223:43954] [OpenOTP:L4T7VH0U] Found 4 user data: TokenType,TokenKey,TokenState,TokenExpire
[2021-12-03 11:45:31] [172.16.3.223:43954] [OpenOTP:L4T7VH0U] Found 1 registered OTP token (TOTP)
[2021-12-03 11:45:31] [172.16.3.223:43954] [OpenOTP:L4T7VH0U] Requested login factors: LDAP & OTP
[2021-12-03 11:45:31] [172.16.3.223:43954] [OpenOTP:L4T7VH0U] LDAP password Ok
[2021-12-03 11:45:31] [172.16.3.223:43954] [OpenOTP:L4T7VH0U] Authentication challenge required
[2021-12-03 11:45:31] [172.16.3.223:43954] [OpenOTP:L4T7VH0U] Started OTP authentication session of ID hmdroIdBdeft1xai valid for 90 seconds
[2021-12-03 11:45:31] [172.16.3.223:43954] [OpenOTP:L4T7VH0U] Sent login challenge response
[2021-12-03 11:45:50] [172.16.3.223:51201] [OpenOTP:L4T7VH0U] New openotpChallenge SOAP request
[2021-12-03 11:45:50] [172.16.3.223:51201] [OpenOTP:L4T7VH0U] > Username: testing
[2021-12-03 11:45:50] [172.16.3.223:51201] [OpenOTP:L4T7VH0U] > Domain: Default
[2021-12-03 11:45:50] [172.16.3.223:51201] [OpenOTP:L4T7VH0U] > Session: hmdroIdBdeft1xai
[2021-12-03 11:45:50] [172.16.3.223:51201] [OpenOTP:L4T7VH0U] > OTP Password: xxxxxx
[2021-12-03 11:45:50] [172.16.3.223:51201] [OpenOTP:L4T7VH0U] Found authentication session started 2021-12-03 11:45:31
[2021-12-03 11:45:50] [172.16.3.223:51201] [OpenOTP:L4T7VH0U] Started transaction lock for user
[2021-12-03 11:45:50] [172.16.3.223:51201] [OpenOTP:L4T7VH0U] TOTP password Ok (token #1)
[2021-12-03 11:45:50] [172.16.3.223:51201] [OpenOTP:L4T7VH0U] Updated user data
[2021-12-03 11:45:50] [172.16.3.223:51201] [OpenOTP:L4T7VH0U] Sent login success response
[2021-12-03 11:50:33] [172.16.3.223:46033] [OpenOTP:OYYS5YXR] New openotpStatus SOAP request
[2021-12-03 11:50:33] [172.16.3.223:46033] [OpenOTP:OYYS5YXR] Sent status response (Ok)
9. Testing a Web Server Integration
You can download and use the RCDevs sample PHP Login Form for OpenOTP to experiment a very simple Web integration with OpenOTP:
Copy the ZIP archive to your public Web server’s document root (for example /var/www/html), and unzip it. It will create a loginform directory. The testing URL on your Web server will be http://yourwebsite.com/loginform/
Be sure to have PHP and the PHP-SOAP extension installed on your public Web server. On a RedHat server, You can install it with:
yum install php php-soap
Enter the loginform directory and edit the index.php file. You need to adjust the OpenOTP SOAP web service URL (server_url) at the beginning of the file. Remember that the web service URLs are displayed in the Applications menu in WebADM.
$server_url = "http://mywebadmserver:8080/openotp/";
You can now go to the login form URL at http://mywebsite.com/loginform/ with a Web browser to test the sample OpenOTP login integration.

Enter the username and LDAP password. You can enter the OTP password in this screen or in the challenge screen (after pressing the ‘Login’ button) as we did in our authentication test previously.
10. Configure your VPN Server with OpenOTP
The configuration of your VPN server depends on your VPN software. Get your vendor documentation and look for a section explaining how to use a RADIUS server for remote authentication. As a general rule, you will need to set up a RADIUS server connection by specifying the IP address of the Radius Bridge and the RADIUS shared secret. On your Radius Bridge server, you will need to edit the /opt/radiusd/conf/clients.conf and add a RADIUS client block (with the IP address of the VPN server and the shared RADIUS secret). Please look at RCDevs’ Radius Bridge Manual for details about the RADIUS server configuration and integration.
Appendix A - OpenOTP Server SOAP API & WSDL
Please, refer to the following documentation.